Fritz and Franz jig - Part 3 | |
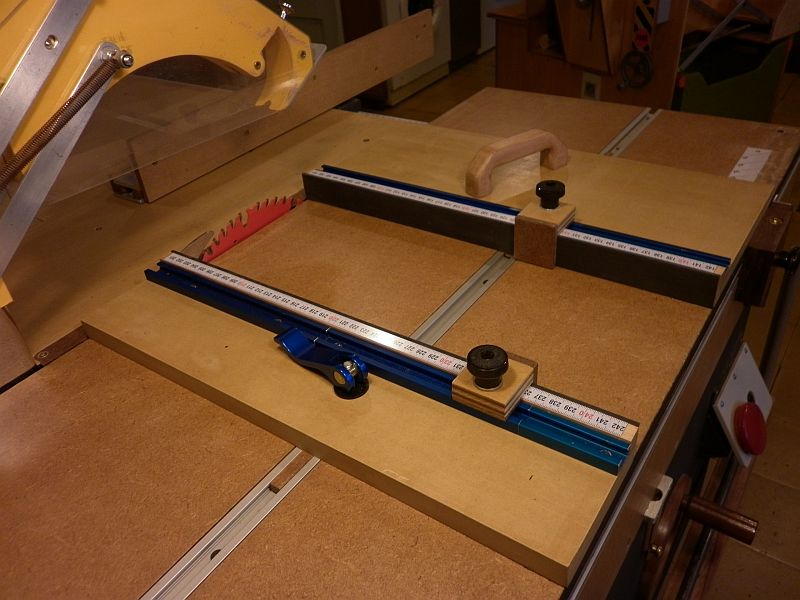 To further enhance the usability of the Fritz and Franz jig I added T-Tracks and a pair of simple adjustable stops. The tracks stop 2mm short at the edge against the blade.
Had some surplus right-to-left self adhesive metric tape which I stuck in place along the tracks. The reading in one of the tapes starts at 2m and the other at 3m (I was not going to purchase new ones so that both started a 0m!). I just set the stops using cm and mm readings ignoring the meters value.
I cut them 5mm short from the ends so that no metal is near the blade. Did the same at the other end to prevent the sharp corners from snagging or lifting accidentally. To install them, I marked a line 10cm from the right edge of the jig and aligned the 10cm mark of the tape to this line. Dead easy.
To further enhance the usability of the Fritz and Franz jig I added T-Tracks and a pair of simple adjustable stops. The tracks stop 2mm short at the edge against the blade.
Had some surplus right-to-left self adhesive metric tape which I stuck in place along the tracks. The reading in one of the tapes starts at 2m and the other at 3m (I was not going to purchase new ones so that both started a 0m!). I just set the stops using cm and mm readings ignoring the meters value.
I cut them 5mm short from the ends so that no metal is near the blade. Did the same at the other end to prevent the sharp corners from snagging or lifting accidentally. To install them, I marked a line 10cm from the right edge of the jig and aligned the 10cm mark of the tape to this line. Dead easy.
 The stops are removable but most of the time I leave them on. If placed offset from each other the jig will still close down to 6mm which is more than enough for most tasks.
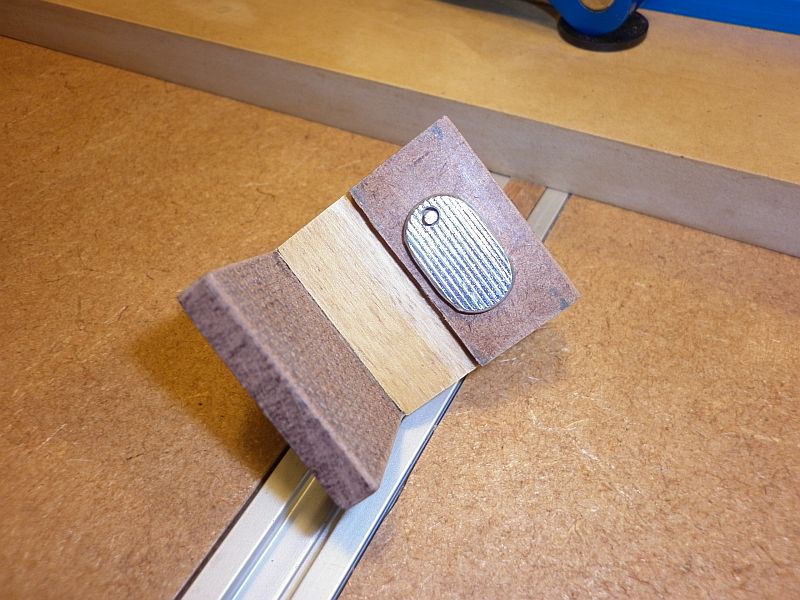 Here is a view of one of the stops as seen from below. Material is all scrap. 13mm plywood, 6mm and 3mm hardboard. The 3mm hardboard was used to create a channel that clears the tape and rubber strip top since both are a bit higher than the T-Track. The clearance over the tape is kept to a minimum so that readings are precise.
Note that a cut-off nail is again used here to keep the T-Bolt head aligned making insertion of the stop into the track a lot easier.
Here is a view of one of the stops as seen from below. Material is all scrap. 13mm plywood, 6mm and 3mm hardboard. The 3mm hardboard was used to create a channel that clears the tape and rubber strip top since both are a bit higher than the T-Track. The clearance over the tape is kept to a minimum so that readings are precise.
Note that a cut-off nail is again used here to keep the T-Bolt head aligned making insertion of the stop into the track a lot easier.
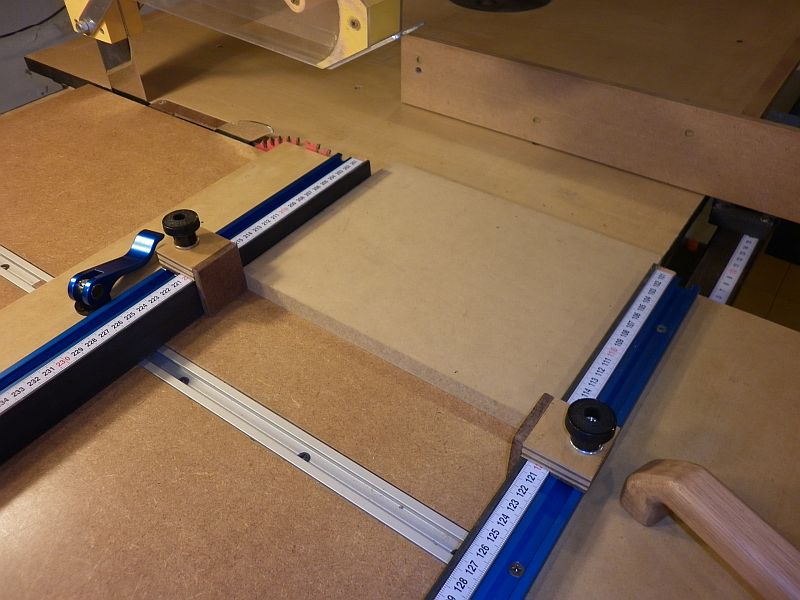 Setting both stops at the same reading allows ripping workpieces up to 70cm long and 40cm wide. No need to use the Rip Fence.
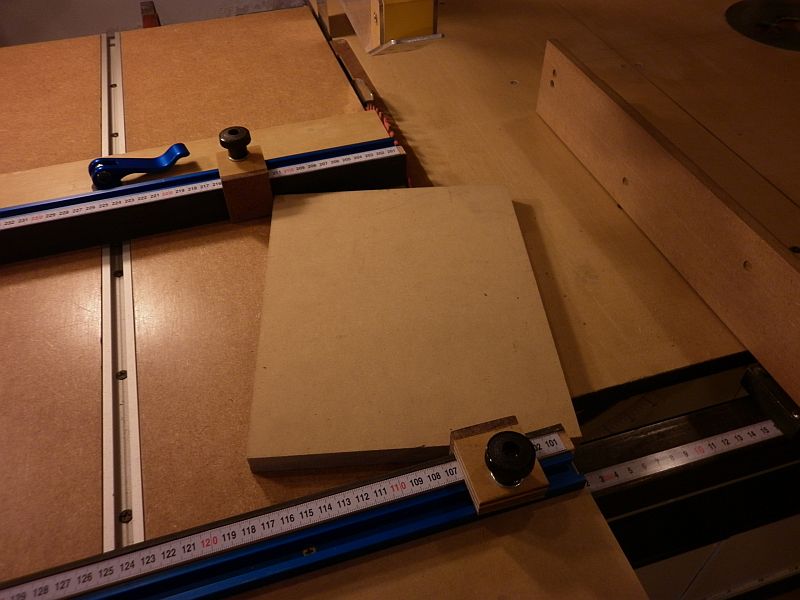 The stops are also helpful when tackling angled cuts. The jig also helps to place the workpiece exactly where the cut will be made. There is no guesswork, just mark the cut and align with the right edge of the jig.
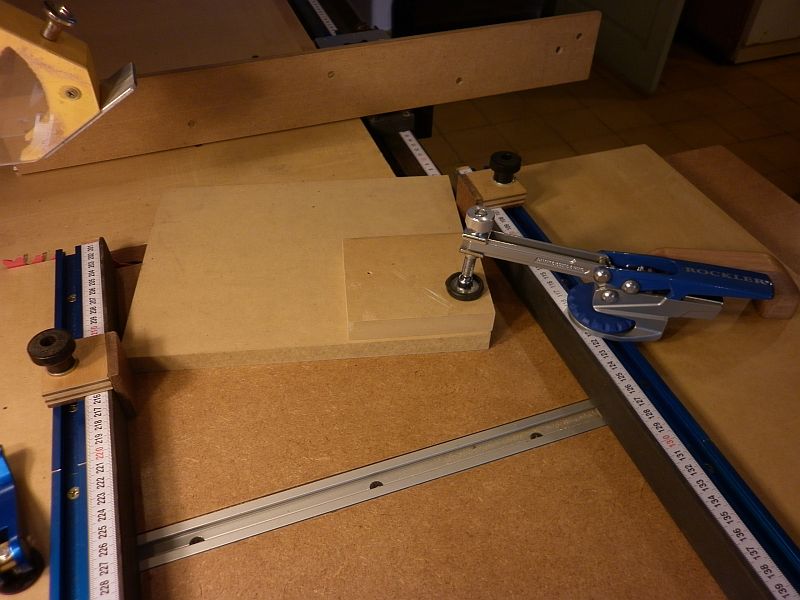 Including T-Tracks offered the added benefit of providing a mounting place for hold-down clamps. While this is not really necessary, it comes in handy with special shaped workpieces.
[ Part 1
| Part 2
| Part 3
| Part 4 ]
| |
| [ back ] |