Fritz and Franz jig - Part 1 | |
 This simple jig with a funny name is a clever and useful aid capable of dealing with difficult tasks with great safety. It is a holding device set on the Sliding Table that is like an extra pair of hands to keep your own well clear of the running blade.
Rather than describing its many features and capabiites we suggest that you have a look at:
www.youtube.com/watch?v=DqzVglze9Nk. The audio is in German but the video tells the whole story by itself. It is promoted by BGHM (BerufsGenossenschaft Holz und Metall) a German insurance and safety institute.
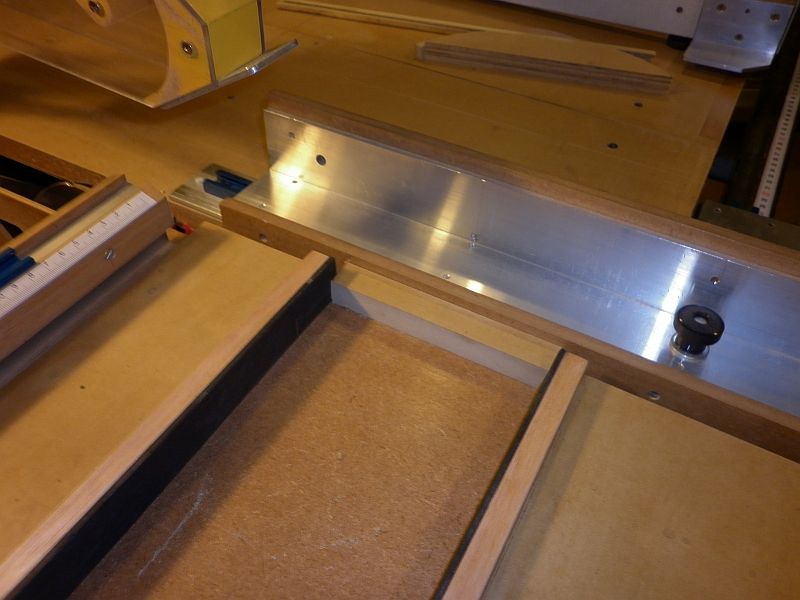
The construction is very simple as you can see in the photos at left. Two 18mm MDF boards, 10cm and 20cm wide respectively. Their front edges receive a strip of wood to make them about 38mm tall (in my case). This depends on the width of the rubber strips you may be able to obtain. These rubber strips are attached with contact cement and securely hold the material being cut.
All the parts you see on the sliding table (between Fritz and Franz) were cut using the jig. Notice that I was even able to cut a circle sector in two with complete safety as well as the four very small cubes.
This simple jig with a funny name is a clever and useful aid capable of dealing with difficult tasks with great safety. It is a holding device set on the Sliding Table that is like an extra pair of hands to keep your own well clear of the running blade.
Rather than describing its many features and capabiites we suggest that you have a look at:
www.youtube.com/watch?v=DqzVglze9Nk. The audio is in German but the video tells the whole story by itself. It is promoted by BGHM (BerufsGenossenschaft Holz und Metall) a German insurance and safety institute.
The construction is very simple as you can see in the photos at left. Two 18mm MDF boards, 10cm and 20cm wide respectively. Their front edges receive a strip of wood to make them about 38mm tall (in my case). This depends on the width of the rubber strips you may be able to obtain. These rubber strips are attached with contact cement and securely hold the material being cut.
All the parts you see on the sliding table (between Fritz and Franz) were cut using the jig. Notice that I was even able to cut a circle sector in two with complete safety as well as the four very small cubes.
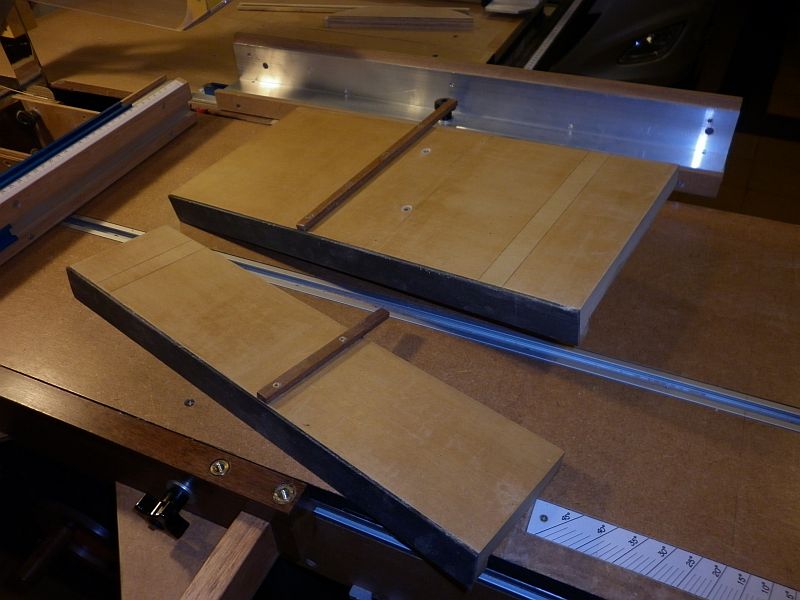
 Let's call Fritz the narrower half which is stationary and rests against the Outrigger Fence. The wider board will the be called Franz and is free to slide until the workpiece is securely gripped between both.
This second photo shows a workpiece roughly 20mm square and about 150mm long. The Rip Fence is set to cut a 5mm thick strip. Note that I slid the fence towards the front of the saw so that its far end is in line with the center of the blade.
To make the cut, press the workpiece agains the Rip Fence and grip it between Fritz and Franz. Start the saw and push the Sliding Table with the handle on Franz. The 5mm thick strip will be free to fall to the right of the blade once the cut is finished since it cannot be trapped by the fence.
Crosscutting is just as easy, the fence being used as a stop block enabling to cut very small parts to equal length.
Let's call Fritz the narrower half which is stationary and rests against the Outrigger Fence. The wider board will the be called Franz and is free to slide until the workpiece is securely gripped between both.
This second photo shows a workpiece roughly 20mm square and about 150mm long. The Rip Fence is set to cut a 5mm thick strip. Note that I slid the fence towards the front of the saw so that its far end is in line with the center of the blade.
To make the cut, press the workpiece agains the Rip Fence and grip it between Fritz and Franz. Start the saw and push the Sliding Table with the handle on Franz. The 5mm thick strip will be free to fall to the right of the blade once the cut is finished since it cannot be trapped by the fence.
Crosscutting is just as easy, the fence being used as a stop block enabling to cut very small parts to equal length.
 Both parts of the jig have hardwood strips that fit into the T-Track groove to precisely locate them squarely in place. These strip should fit snugly in the slot but still must allow the parts to slide freely. Use small woodscrews to attach them. Do not use glue, otherwise it will be difficult to replace them if worn with use.
The boards should be cut slightly longer on the blade side, installed in place and trimmed to length. This provides both a reference as to where the workpiece will be cut and splinter free crosscuts.
Both parts of the jig have hardwood strips that fit into the T-Track groove to precisely locate them squarely in place. These strip should fit snugly in the slot but still must allow the parts to slide freely. Use small woodscrews to attach them. Do not use glue, otherwise it will be difficult to replace them if worn with use.
The boards should be cut slightly longer on the blade side, installed in place and trimmed to length. This provides both a reference as to where the workpiece will be cut and splinter free crosscuts.
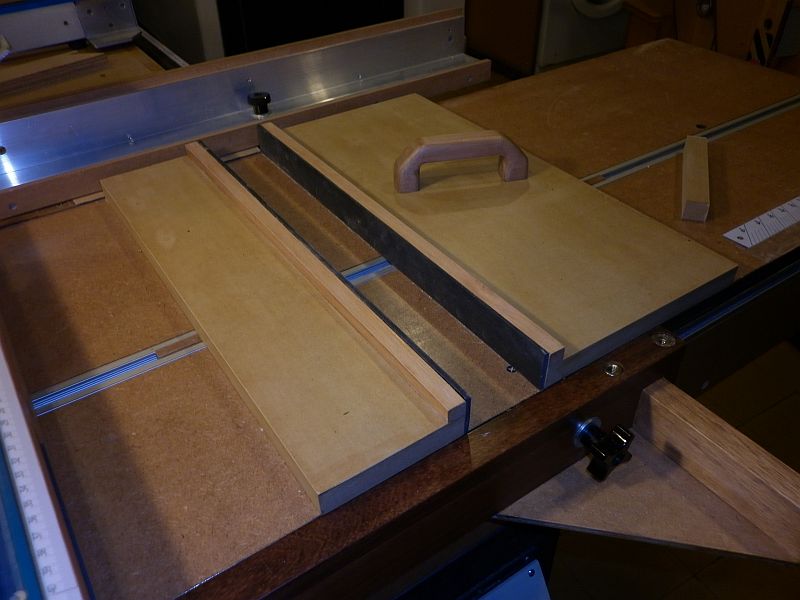 The handle is located approximately on top of the T-Track groove and at an angle to grasp it comfortably.
This completes the first part of this article. In next installments I will describe how to add a few features to increase the usability of this interesting jig.
The handle is located approximately on top of the T-Track groove and at an angle to grasp it comfortably.
This completes the first part of this article. In next installments I will describe how to add a few features to increase the usability of this interesting jig.
[ Part 1
| Part 2
| Part 3
| Part 4 ]
| |
| [ back ] |